In the realm of electronics and DIY projects, combining a temperature sensor like the LM35 with an Aroniduino is .stha popular and effective way to measure and monitor temperature. This guide will walk you through the essentials of using the LM35 temperature sensor with an Arduino, providing clear instructions and valuable insights.
What is the LM35 Temperature Sensor?
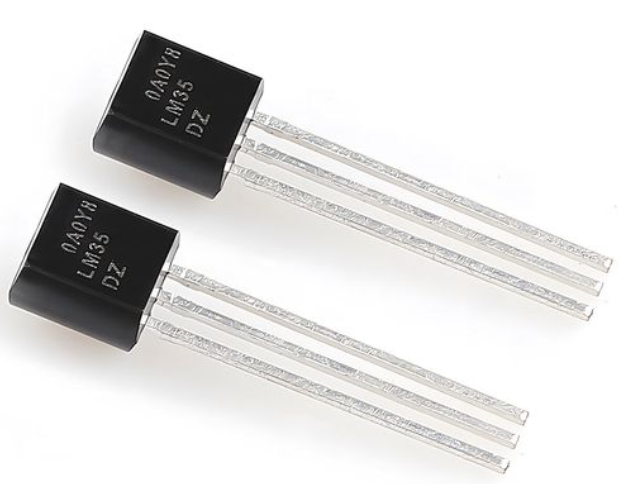
The LM35 is a precision integrated circuit temperature sensor designed to provide an analog voltage output that is proportional to the Celsius temperature. Unlike other sensors that require complex calibration or additional components, the LM35 offers a straightforward solution for temperature measurement. Its key features include:
- Analog Output: The LM35 provides a voltage output that is directly proportional to the temperature in Celsius. For example, 10mV corresponds to 1°C.
- Wide Operating Range: It can operate over a range of -55°C to +150°C, making it suitable for various applications.
- Accuracy: Typically, the LM35 has an accuracy of ±0.5°C, which is sufficient for many applications.
- Ease of Use: With only three pins (VCC, Output, and GND), it is simple to integrate into any project.
Why Use an Arduino with the LM35?
An Arduino microcontroller is an excellent companion for the LM35 due to its versatility and ease of programming. Here’s why this combination works so well:
- Analog Input Capability: Arduino boards, such as the Arduino Uno, have built-in analog-to-digital converters (ADCs) that can read the voltage output from the LM35.
- Processing Power: Arduino can process the analog input and convert it into meaningful temperature readings.
- Versatility: You can easily expand the project by adding displays, logging data, or even controlling other devices based on temperature readings.
Connecting the LM35 to an Arduino
Connecting the LM35 to an Arduino is straightforward. Here’s a step-by-step guide:
- Pinout: The LM35 has three pins:
- VCC: Connect this to the 5V pin on the Arduino.
- Output: This pin provides the analog voltage corresponding to the temperature. Connect it to one of the Arduino’s analog input pins (e.g., A0).
- GND: Connect this to the ground (GND) pin on the Arduino.
Wiring: Use jumper wires to connect the LM35 to the Arduino as described above. Ensure that the connections are secure.
Power: The LM35 can operate on a wide voltage range (4V to 30V), but for compatibility with the Arduino, using the 5V supply is recommended.
Programming the Arduino
Once the hardware is set up, you’ll need to write a program to read the temperature data from the LM35. Here’s a basic example using the Arduino IDE:
// Define the pin where the LM35 is connected
const int sensorPin = A0;

void setup() {
// Initialize serial communication at 9600 baud rate
Serial.begin(9600);
}

void loop() {
// Read the analog value from the LM35
int sensorValue = analogRead(sensorPin);

// Convert the analog value to voltage
float voltage = sensorValue * (5.0 / 1023.0);

// Convert voltage to temperature (10mV per degree Celsius)
float temperatureC = voltage * 100.0;

// Print the temperature to the serial monitor
Serial.print("Temperature: ");
Serial.print(temperatureC);
Serial.println(" °C");

// Delay for stability
delay(1000);
}
Explanation of the Code:
- sensorPin: This constant defines the analog input pin (A0) where the LM35 is connected.
- analogRead(sensorPin): Reads the analog value from the LM35, which is a value between 0 and 1023.
- voltage calculation: Converts the analog value to a voltage (since the Arduino operates at 5V).
- temperature calculation: Since the LM35 outputs 10mV per degree Celsius, multiplying the voltage by 100 gives the temperature in Celsius.
- Serial.print: Outputs the temperature to the serial monitor for viewing.
Practical Applications
The combination of an LM35 temperature sensor and an Arduino is versatile and can be used in various projects, such as:
- Home Automation: Create a temperature-controlled fan or heater.
- Weather Stations: Build a simple weather station to monitor temperature.
- Industrial Applications: Use in processes where temperature monitoring is critical.
- Educational Projects: Teach basic electronics and programming concepts.
Tips for Accurate Measurements
To ensure accurate temperature readings, consider the following tips:
- Calibration: While the LM35 is factory-calibrated, you can improve accuracy by performing a simple calibration if needed.
- Stable Power Supply: Ensure the Arduino and LM35 receive a stable power supply to avoid fluctuations in readings.
- Shielding: If using the sensor in a noisy environment, consider shielding the wiring to reduce interference.
Conclusion
The LM35 temperature sensor paired with an Arduino offers a simple yet powerful solution for temperature measurement and monitoring. Whether you’re a beginner or an experienced hobbyist, this combination provides a reliable and easy-to-implement method for capturing temperature data. By following the steps outlined in this guide, you can successfully integrate the LM35 with your Arduino and embark on a wide range of temperature-related projects.