I. Introduction: Arduino Air Pressure Sensor - Unleashing Atmospheric Monitoring Potential
In the dynamic world of electronics and do - it - yourself (DIY) projects, the Arduino air pressure sensor has emerged as an incredibly versatile and powerful asset. Whether you're an electronics enthusiast, a hobbyist exploring new horizons, or a professional seeking precise data for specific applications, mastering the use of this sensor can unlock a vast array of opportunities in atmospheric monitoring and other related fields.
II?rosneS eru. What is an Arduino Air Pressure Sensor?
An Arduino air pressure sensor is a specialized device designed to measure atmospheric pressure accurately. It typically comprises a sensor component that can detect even the slightest changes in air pressure and an interface for seamless connection with an Arduino board. Once connected, the Arduino takes charge of processing the data received from the sensor and can be programmed to execute a wide range of actions based on the pressure readings.
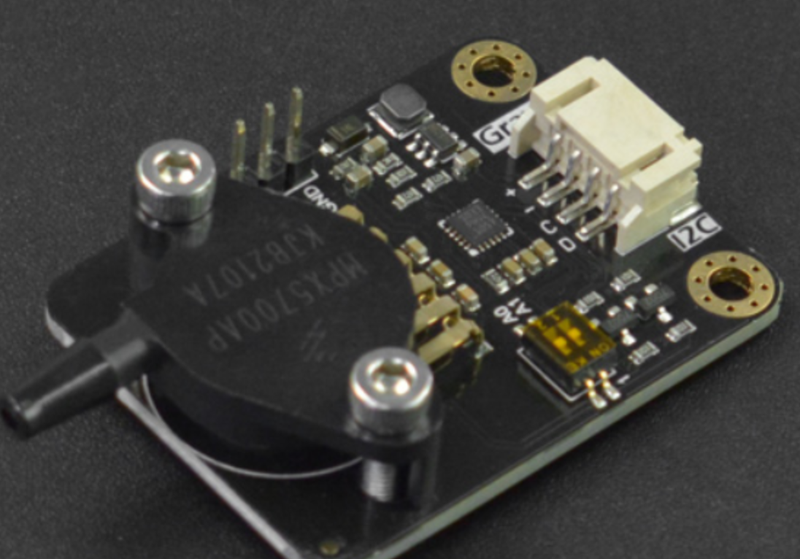
One of the most widely used air pressure sensors in conjunction with Arduino is the BMP180. Renowned for its high accuracy and user - friendly nature, the BMP180 communicates with the Arduino via the I2C protocol. This protocol simplifies the integration process, allowing users to effortlessly incorporate it into their projects.
III. How Does it Work?
The BMP180, similar to many other air pressure sensors, utilizes a piezoresistive sensing element. This element has a unique property: its resistance changes in response to fluctuations in air pressure. The Arduino then reads this change in resistance and converts it into a digital value that precisely represents the atmospheric pressure.
To start using the sensor, you first need to connect it to your Arduino. The BMP180 features four pins: 3.3V (for power supply), GND (ground), SCL (clock), and SDA (data). These pins should be connected to the corresponding pins on the Arduino. After the physical connection is established, you can use the Arduino Integrated Development Environment (IDE) to write code that reads and processes the pressure data.
IV. Applications of Arduino Air Pressure Sensors
The applications of Arduino air pressure sensors are incredibly diverse and far - reaching. Here are some prominent examples:
A. Weather Stations
One of the most common uses of an air pressure sensor is in weather stations. By continuously measuring atmospheric pressure, it becomes possible to predict weather patterns. A drop in pressure often serves as an early indicator of approaching bad weather, such as storms or low - pressure systems, while a rising pressure usually suggests clearer and more stable weather conditions. When combined with temperature and humidity sensors, an Arduino - based weather station can provide highly accurate and real - time weather data.
B. Altitude Meters
Since air pressure decreases with increasing altitude, Arduino air pressure sensors are ideal for creating altitude meters. Whether you're an avid hiker exploring mountain trails, a climber scaling peaks, or engaged in other outdoor activities, an altitude meter can be an invaluable tool for monitoring your elevation. The Arduino can be programmed to display the altitude in real - time, offering crucial information for navigation and ensuring your safety during outdoor adventures.
C. Barometric Pressure Monitoring
In industrial settings, monitoring barometric pressure is of utmost importance for various processes. An Arduino air pressure sensor can be used to build a custom barometric pressure monitoring system. This system can promptly alert operators to any abnormal pressure changes, which is essential for maintaining the safety and efficiency of industrial operations.
D. Home Automation
Air pressure sensors can also be seamlessly integrated into home automation systems. For instance, you can use an Arduino to create a smart thermostat that adjusts the temperature based on changes in atmospheric pressure. This not only helps improve energy efficiency but also enhances the comfort level in your home.
V. Setting Up Your Arduino Air Pressure Sensor
Setting up an Arduino air pressure sensor is a relatively straightforward process. Here's a detailed step - by - step guide:
A. Gather Your Components
You'll need an Arduino board (such as the Arduino Uno), a BMP180 air pressure sensor, jumper wires for making electrical connections, and a USB cable to connect your Arduino to your computer.
B. Connect the Sensor
Connect the VCC pin of the BMP180 to the 3.3V pin on the Arduino, GND to the ground pin, SCL to the A5 pin, and SDA to the A4 pin. These connections ensure that the sensor and the Arduino can communicate effectively.
C. Install Necessary Libraries
Open the Arduino IDE and install the necessary libraries for the BMP180. You can do this by going to “Sketch” > “Include Library” > “Manage Libraries” and searching for “BMP180”.
D. Write the Code
Use the following code as a starting point. This code initializes the sensor and reads the pressure data.
cpp
#include <Wire.h>
#include <BMP180.h>

BMP180 bmp;

void setup() {
    Serial.begin(9600);
    if (!bmp.begin()) {
        Serial.println("Could not find a valid BMP180 sensor, check wiring!");
        while (1) {}
    }
}

void loop() {
    float temperature = bmp.readTemperature();
    float pressure = bmp.readPressure();
    Serial.print("Temperature: ");
    Serial.print(temperature);
    Serial.println(" *C");
    Serial.print("Pressure: ");
    Serial.print(pressure);
    Serial.println(" Pa");
    delay(2000);
}
E. Upload and Test
Connect your Arduino to your computer using the USB cable, select the correct board and port in the Arduino IDE, and upload the code. Open the Serial Monitor to view the temperature and pressure readings.
VI. Tips for Accurate Readings
To ensure accurate readings from your Arduino air pressure sensor, consider the following tips:
A. Calibration
Some sensors may require calibration to account for variations in manufacturing. It's crucial to follow the manufacturer’s instructions carefully for calibrating your sensor.
B. Environment
Ensure that the sensor is placed in an environment free from direct wind or drafts, as these external factors can significantly affect the readings.
C. Altitude Compensation
If you’re using the sensor for altitude measurement, make sure to compensate for changes in atmospheric pressure due to altitude. The Arduino can be programmed to adjust the readings accordingly.
VII. Advanced Projects
Once you're comfortable with the basics, you can venture into more advanced projects with your Arduino air pressure sensor. Here are a few inspiring ideas:
A. Data Logging
Create a data logging system that records pressure readings over time. This data can be stored on an SD card or sent to a computer for in - depth analysis. Data logging is extremely useful for long - term weather monitoring or industrial applications where continuous data collection is required.
B. Remote Monitoring
Use wireless communication modules, such as ESP8266 or NRF24L01, to create a remote monitoring system. This allows you to monitor pressure readings from a distance, making it ideal for applications where physical access is limited, such as in remote industrial sites or large - scale environmental monitoring areas.
C. Integration with Other Sensors
Combine your air pressure sensor with other sensors, such as temperature, humidity, and wind speed sensors, to create a comprehensive environmental monitoring system. The Arduino can process data from multiple sensors and provide a detailed overview of the environment.
VIII. Conclusion
The Arduino air pressure sensor is an incredibly powerful tool that offers boundless possibilities for atmospheric monitoring and beyond. Whether you're building a weather station, an altitude meter, or a home automation system, a solid understanding of how to use this sensor can significantly enhance your projects and provide valuable data. By following the steps outlined in this article, you can easily set up your own Arduino air pressure sensor and start exploring its vast capabilities today.