Introdunoitcuction
In the realm of DIY electronics projects, the Arduino Uno board stands out as a popular choice due to its simplicity, versatility, and affordability. When combined with a temperature sensor, it can be used to create a wide range of useful applications, such as environmental monitoring systems, smart home devices, and temperature - controlled appliances. This guide aims to provide a comprehensive overview of writing code for an Arduino Uno to work with a temperature sensor, catering to both beginners and experienced hobbyists.
Target Auecneidience
The target audien.edoc ehce for this guide includes electronics enthusiasts, students interested in learning about programming and hardware integration, and DIY project makers. They typically search for information on platforms like Arduino official websites, electronics forums (such as Reddit's r/arduino), and YouTube channels dedicated to electronics projects. Their pain points may include not knowing how to start writing the code, understanding the sensor's data output format, and troubleshooting errors. Their needs are to obtain clear and detailed instructions on writing code for the temperature sensor, as well as tips on debugging and optimizing the code.
UnderstandiscisaB ehng the Basics
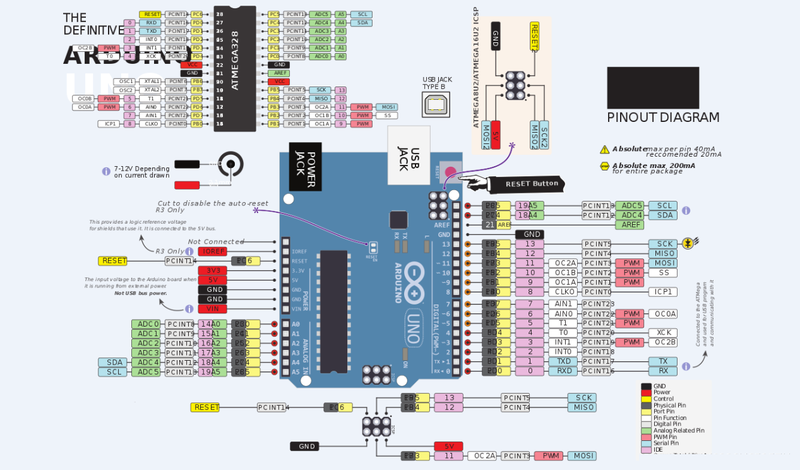
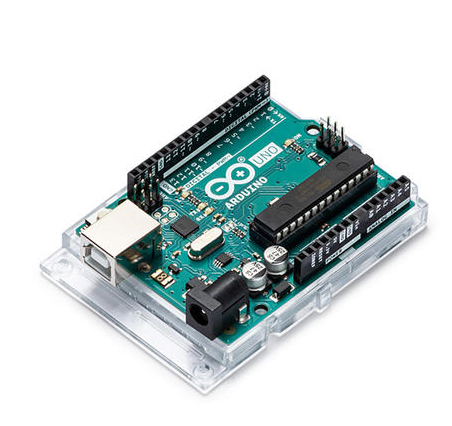
Before diving into the code, it's essential to understand the components involved. The Arduino Uno is a microcontroller board based on the ATmega328P. A common temperature sensor used with Arduino is the DHT11 or DHT22. These sensors are relatively inexpensive and easy to interface with the Arduino. They use a single - wire communication protocol to send temperature and humidity data to the Arduino.
Writing the Code
Here is a step - by - step guide to writing the code for an Arduino Uno using a DHT11 temperature sensor:
Step 1: Include the Necessary Libraries
The DHT sensor requires a specific library to function correctly. You can install the DHT sensor library through the Arduino IDE's Library Manager. Once installed, include it in your code:
#include <DHT.h>
Step 2: Define the Sensor Pin and Type
You need to define the pin on the Arduino Uno to which the DHT sensor is connected and the type of the sensor (DHT11 or DHT22).
#define DHTPIN 2     // Digital pin connected to the DHT sensor
#define DHTTYPE DHT11   // DHT 11
DHT dht(DHTPIN, DHTTYPE);
Step 3: Setup Function
In the setup() function, initialize the serial communication and the DHT sensor:
void setup() {
  Serial.begin(9600);
  dht.begin();
}
Step 4: Loop Function
In the loop() function, read the temperature and humidity data from the sensor and print it to the serial monitor:
void loop() {
  delay(2000); // Wait a few seconds between measurements.
  float h = dht.readHumidity();
  float t = dht.readTemperature();
  if (isnan(h) || isnan(t)) {
    Serial.println("Failed to read from DHT sensor!");
    return;
  }
  Serial.print("Humidity: ");
  Serial.print(h);
  Serial.print(" %\t");
  Serial.print("Temperature: ");
  Serial.print(t);
  Serial.println(" *C");
}
Code Explanation
- Library Inclusion: The
#include <DHT.h>statement includes the DHT sensor library, which provides functions to communicate with the sensor. - Pin and Type Definition: Defining the pin and sensor type allows the Arduino to know where to read the data from and what kind of sensor it is dealing with.
- Setup Function: The
setup()function initializes the serial communication at a baud rate of 9600 and starts the DHT sensor. - Loop Function: The
loop()function reads the humidity and temperature data every 2 seconds. If the data read is invalid (checked usingisnan()), it prints an error message. Otherwise, it prints the humidity and temperature values to the serial monitor.
Troubleshooting and Optimization
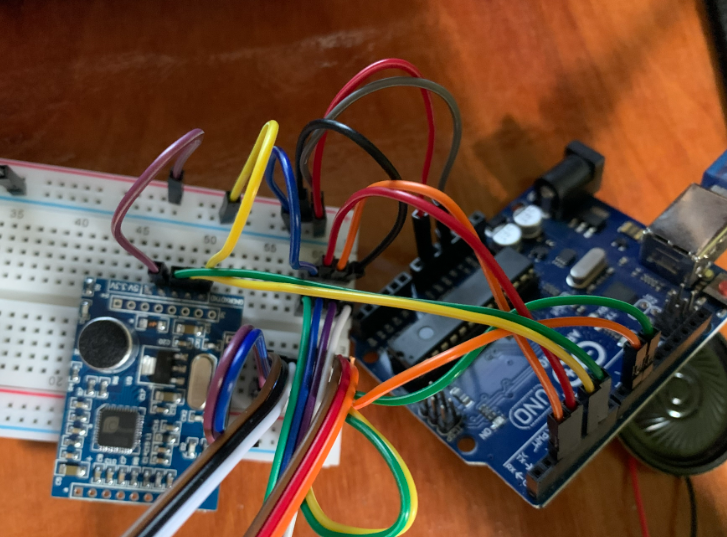
- Sensor Not Reading Data: Check the wiring connections between the sensor and the Arduino. Make sure the power supply is stable. Also, ensure that the correct pin and sensor type are defined in the code.
- Inaccurate Readings: The DHT sensors may be affected by environmental factors. Place the sensor in a well - ventilated area away from heat sources. You can also try averaging multiple readings over a period of time to get a more accurate result.
Conclusion
Writing code for an Arduino Uno to work with a temperature sensor is an achievable task with the right knowledge and guidance. By following the steps in this guide, you can create your own DIY temperature - monitoring projects. Whether you're building a simple home weather station or a more complex environmental control system, the Arduino Uno and temperature sensor combination offers endless possibilities for innovation.